TM 1-1520-264-23
2.26.3.6
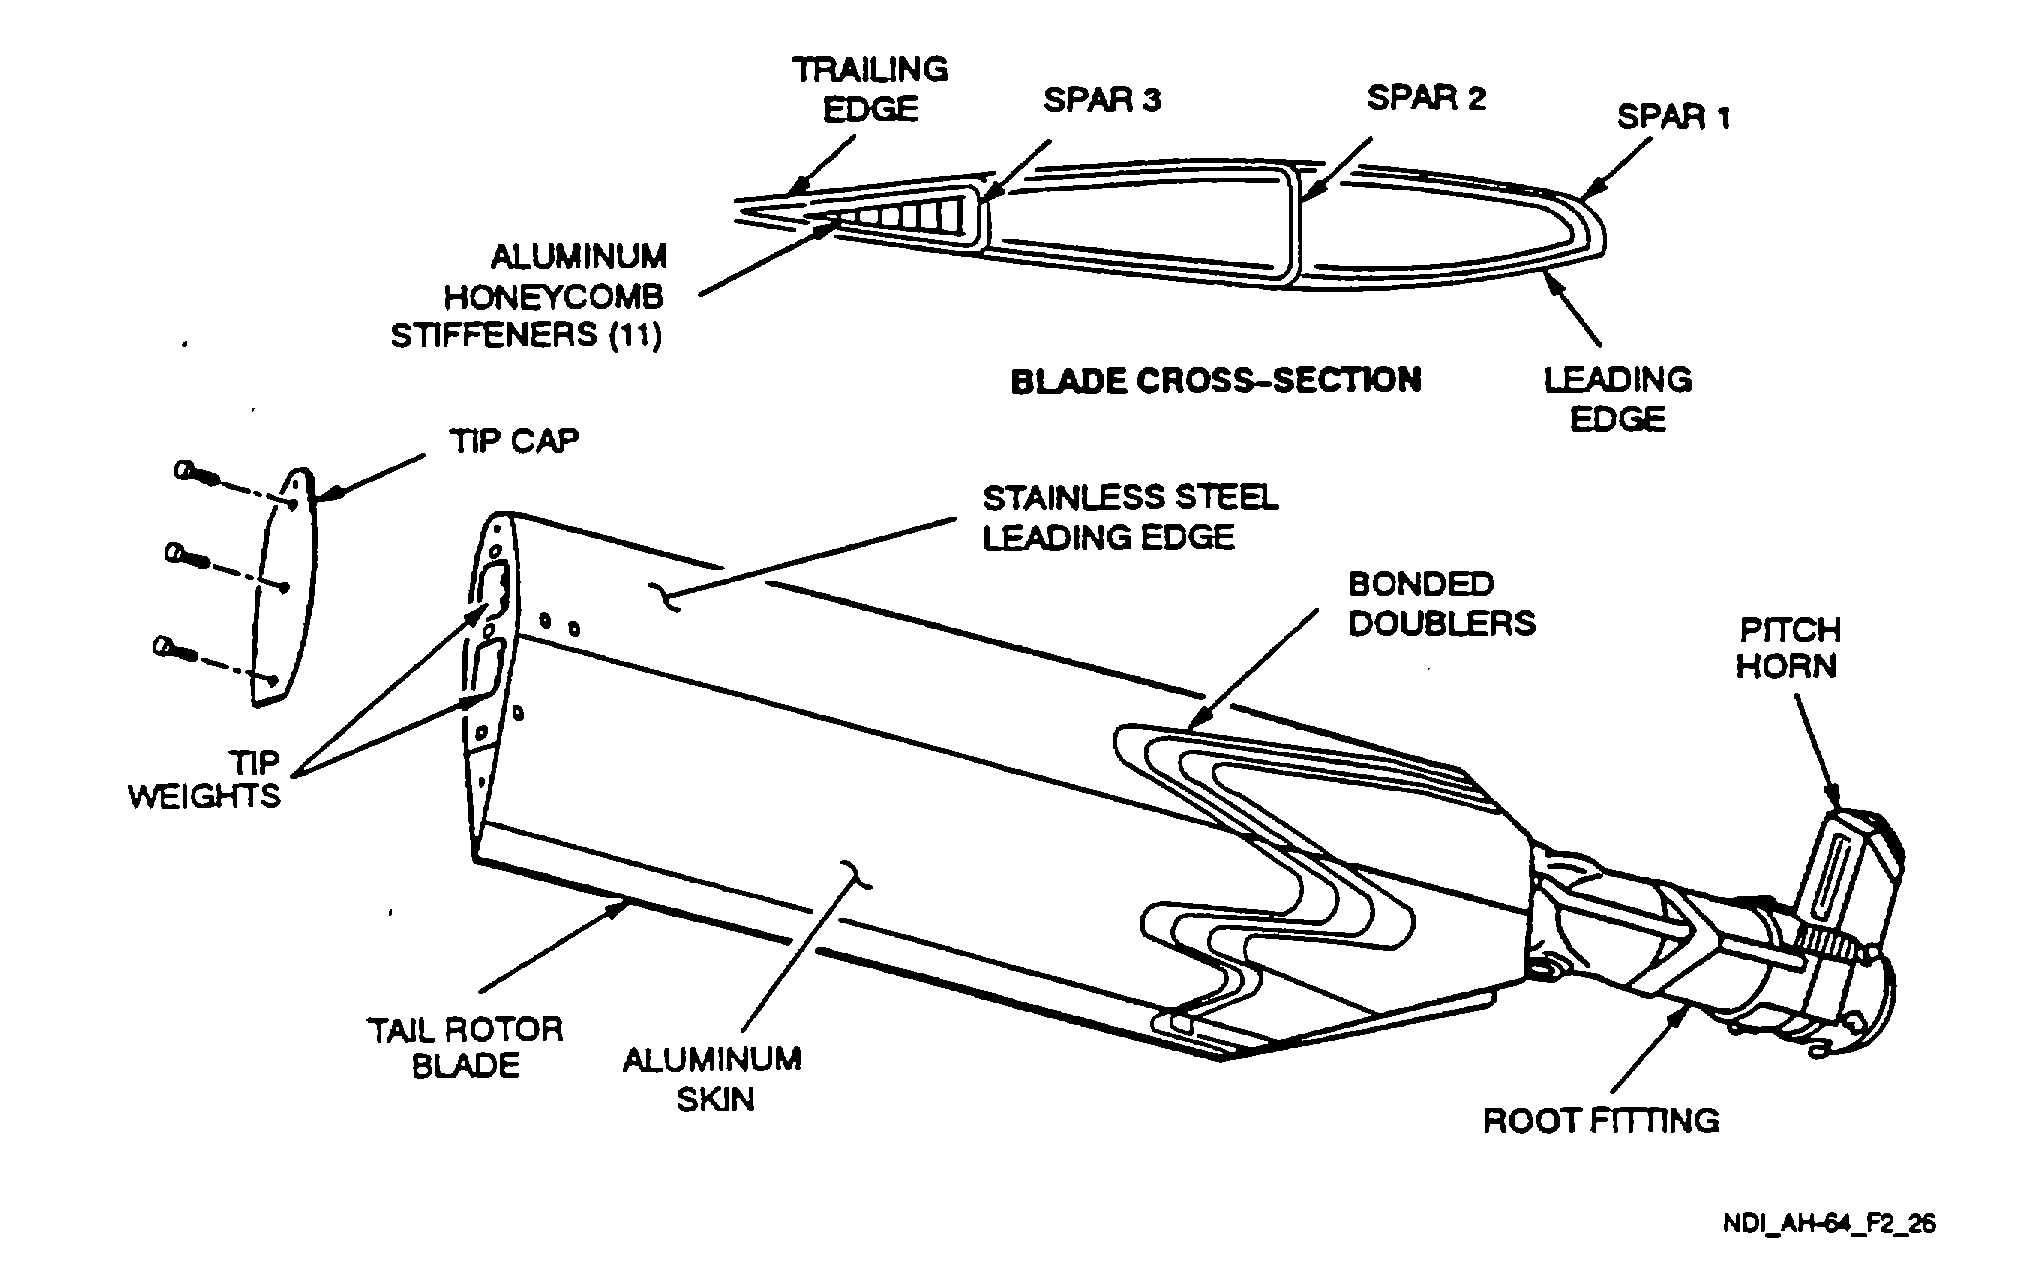
Inspection Procedure. Refer to Bond Test Method, paragraph 1.4.6 and inspection areas are shown in Figure
2-26.
a.
Skin-to-Honeycomb Voids. Place probe on tail rotor blade in location where test for skin-to-honeycomb bond
separation is desired and press NULL. Move probe from good to suspect area and note response. A strong
amplitude change and phase shift similar to the standard is indicative of a void. This set-up is very sensitive
to thin skin-to-core bonding. Move probe slowly over the skin and note the slight amplitude change (bounce)
as the probe senses alternately the honeycomb cell nodes and cell walls.
NOTE
The basic setup provided above also selects a frequency that provide a
satisfactory inspection for voids associated with skin-to-spar, skin-to-trailing
edge, doubler-to-doubler and doubler-to-skin, and trim tab bonding.
b.
Use the NULL and GAIN adjustments to reset the ACTIVE screen for the areas to be inspected (do not go
back to SET mode). Also, compare similar areas. For example, to check for spar to skin voids, check front
and back of blade in the same area, or check another blade in the same area. Observe that, when moving
the probe chordwise from the spar to the trailing edge, the transitions at the spar-to-honeycomb and the
honeycomb-to-trailing edge strip are easily detected. When inspecting these areas, adjust the NULL and
GAIN and move the probe carefully along the transition using a straight edge or other guide. A localized
phase and amplitude shift similar to the test block indicates a void.
Figure 2-26.
Tail Rotor Blade (Voids)
2-60