TM 1-1500-204-23-6
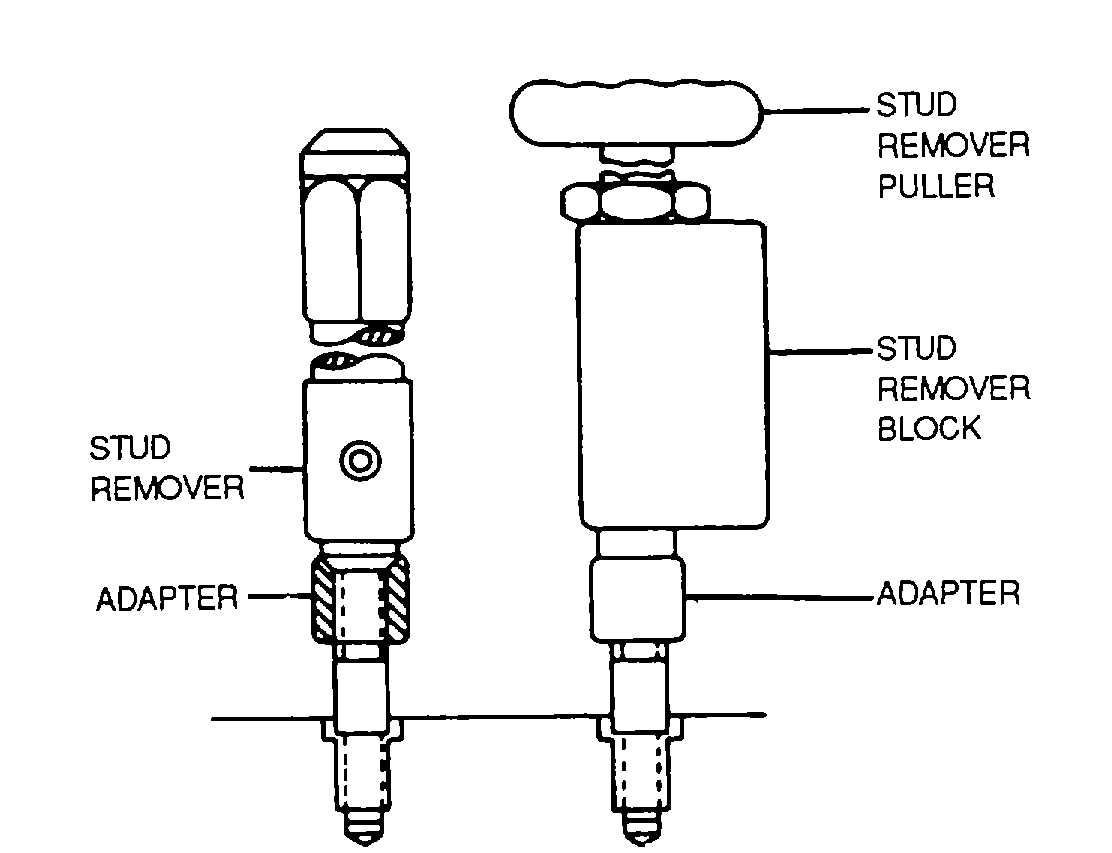
Figure 2-64. Stud Removal
NOTE
A drill jig recommended for
moderate
use
when
drilling
broken
studs
where
it
is
impractical to have a complete
set of stud replacement jigs.
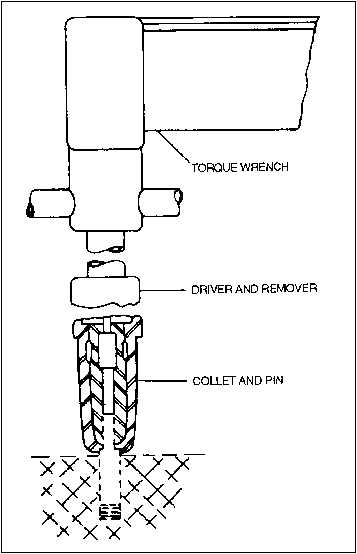
Figure 2-65. Stud Installation
(6)
Drill a pilot hole in stud, using 1/8-inch diameter
by 5-1/8 inch drill
(7)
If stud has a diameter of 7/16 inch or greater,
enlarge pilot hole in stud using 1/4-inch diameter drill.
(8)
Redrill hole in stud, using proper drill for stud
size.
(9)
Select proper removing tool for stud size
(10)
Drive removing tool into drilled hole in stud.
(11)
Remove stud, using tap wrench
Figure 2-65. Stud Installation
b. Installing New Stud. The procedures for retapping and installation are as follows.
CAUTION
Excessive amounts of lubricants shall be avoided, especially in blind
holes Use only sufficient lubricant to cover sides of threads with a thin
coating Excessive lubricant can prevent proper stud installation.
(1)
When replacing a stud with another stud of the same size, run proper size tap into hole to clean
up threads without removing any metal.
(2)
When retapping for next oversize stud, use proper tap for die-cut studs. If stud cannot be driven
at torque specified in applicable aircraft maintenance manual, retap with tap for rolled thread studs of same size.
NOTE
Unless otherwise specified, antiseize compound MIL-T-83483 shall be
applied in tapped holes.
(3)
Select proper size stud and install with driver and remover, and collet and pin, as shown in figure 2-65
(4)
Use torque wrench to determine torque at required height of stud.
2-55