
NAVAIR 01-1A-505-2
006 04
TO 00-25-255-1
Page 5
TM 1-1500-323-24-2
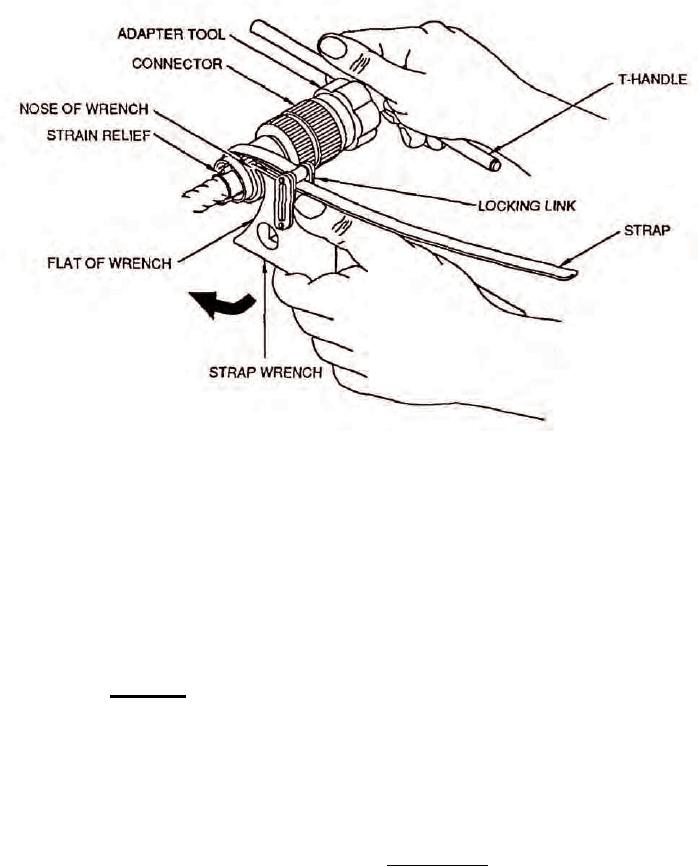
Figure 5. Tightening Position of Wrench
e.
Insert T-handle into socket of adapter tool to
10. BACKSHELL INSTALLATION. Upon completion
provide holding (Figure 3).
of maintenance or modification the backshell must be
replaced. Proceed using following procedure:
f.
To tighten backshell apply force clockwise as
viewed from connector rear (Figure 5).
a. Untape backshell from bundle. Start backshell
on connector by hand to prevent cross threading.
NOTE
Tighten by hand until the rear connector teeth and the
accessory teeth interlock.
Refer to NAVAIR 01-1A-505-1 WP 011 01, for
torque value information on MIL-C-85049
b. Select correct adapter tool (Table 1), T-handle,
connector backshells.
and strap wrench (Figure 2).
11. GROMMET NUTS. The grommet nut is a threaded
CAUTION
ring nut utilized to securely hold the connector grommet
in place. M83723/35 is illustrated in Figure 6 and
Ensure white dot on adapter tool aligns with
M85049/31 is illustrated in Figure 7. See Note following
master key of connector. Spinning tool on
paragraph 2 this WP on AS, M and MS prefix.
connector will cause damage to tool and/or
connector (Figure 3).
12. CABLE CLAMPS/STRAIN RELIEFS. The following
two paragraphs explain the two types of cable support
c.
Mate adapter tool to connector. Ensure white
or clamping devices.
dot on adapter tool aligns with master key of connector
(Figure 3).
13. Cable Clamps. A cable clamp is a support or
clamping device which requires use of an intermediate
d. Install strap wrench around part to be installed.
component for attachment to back of connector
Draw strap tightly through locking link. Backshell will
(Figure 8).
rest on nose of wrench (Figure 3).