
NAVAIR 01-1A-505-2
008 02
TO 00-25-255-1
Page 30
TM 1-1500-323-24-2
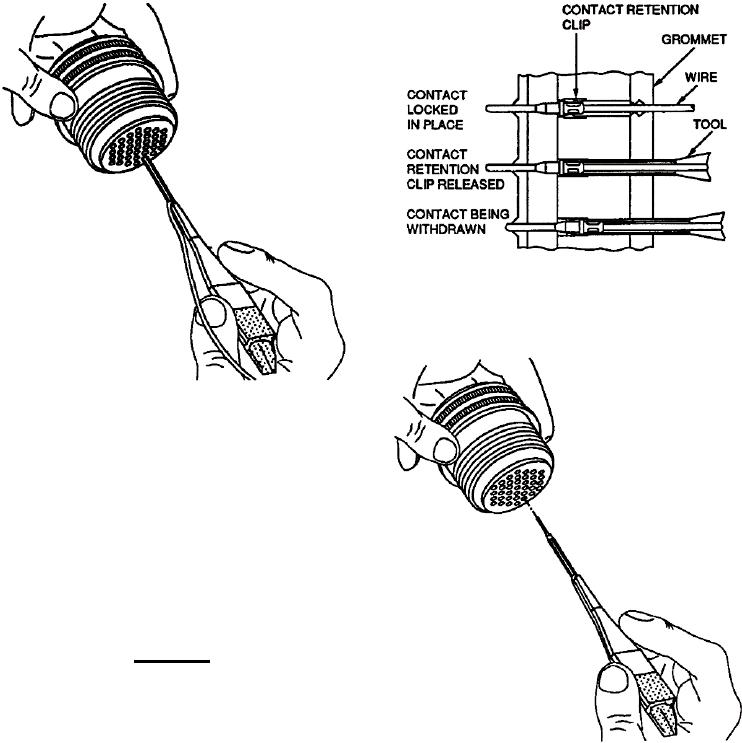
Figure 20. Unlocking Contact Mechanism
Figure 19. Removal Tool on Wire
c.
Slide removal tool along wire at a right angle to
connector insert face and align with contact cavity
(Figure 19).
d. Insert tool into contact cavity until tool tip
bottoms against contact shoulder (Figure 20). A slight
increase in resistance will be noticed just before the tool
tip bottoms. This will spread the retention clip and
release its hold on the contact.
CAUTION
For smaller diameter wires, ensure the tool
does not collapse around the wire when
inserted and cause the tool tip to hit the contact
crimp barrel instead of sliding over it. A
collapsing tool can damage grommet sealing
wafers, resulting in connector damage
Figure 21. Removing Contact from Connector
requiring connector replacement.
e.
Press wire firmly against serrated edge of
removal tool and pull wire straight out from contact
cavity (Figure 21).