
TM 55-1670-251-20&P/TO 13D3-2-2
for wear and any burrs which may abrade the
belly bands. Remove burrs, check for free running
o f anchor on belly bands. If the positioning
anchor strap cannot be adjusted to obtain a free
sliding movement, it should be replaced.
b. Anti Chafe Pad. Inspect outer lines
of pad assembly for tears and abrasion. Check
"Velcro" bonded attachment. Before initiating
repair to liner, allow felt filler to dry thoroughly.
Rebond "Velcro" as required. Replace pad assem-
bly when beyond economical repair.
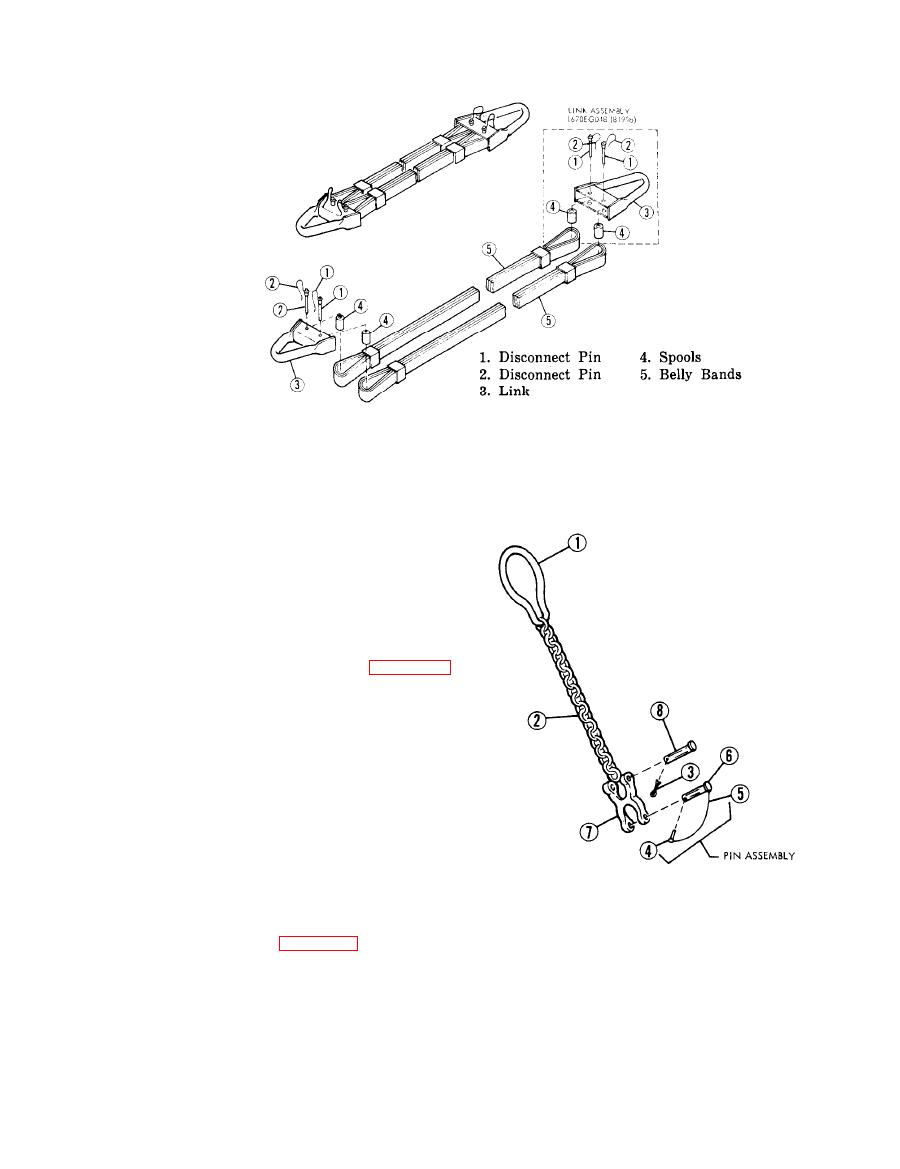
c. Belly Band Assembly. Using dis-
assembly procedures illustrated in figure 2-5,
remove quick disconnect pins, (1) and (2) and
separate link, from the belly bands, Remove the
spools from the belly bands. Inspect the belly
bands for fraying and abrasion, particularly in
the region of the spools. Any evidence of abrasion
of the nylon belly-bands shall warrant replacement
(individual straps may be replaced). Inspect the
spools and inside the link for smoothness of sur-
face, remove any burrs that are evident. Any
deformation of the spools or pins shall warrant
replacement. Check fitting for evidence of cracks
in vicinity of welds and for peeling of protective
plating. Replace if cracks or peeling are evident.
1.
Pin
5.
Strap Webbing
Assembly is opposite of above procedure.
2.
Chain
6.
Clevis Pin
3.
Cotter Pin
7.
Fitting
d. Chain Leg Assembly. Use disassembly
4.
Disconnect Pin
8.
Pin
procedures illustrated in figure 2-6. Remove the
quick disconnect. pin and pull the large diameter
clevis pin from the fitting. Remove the cotter pin
and slide the small diameter pin from the fitting
P/N 1670EG078B1.
thus releasing the chain. Remove the chain from
the grab link and inspect both components for
Change 4
2-5
