
TM 55-1670-251-20&P/TO 13D3-2-2
pin diameter is worn such that it can be detected
freedom of operation and alignment. Replace if
by feel, particularly in the area of the clevis
locking mechanism does not operate freely or if
connection or is cracked it should be replaced.
the pin is bent. Inspect both clevis pins for align-
Inspect the coupling links for wear, cracks or
ment, cracks and wear. If pins are bent or worn
peeling of the plating. If wear in the area of the
in excess of 0.02 inches-replace. Inspect the
belly band assembly exceeds 0.02 inches or if peel-
clevis fitting for indications of wear, cracks or
ing or cracks are evident-replace the links as
bending particularly at the pin holes. If worn in
an assembly.
excess of 0.02 inches-replace. Inspect the chain
for evidence of wear and cracks. Any cracks or
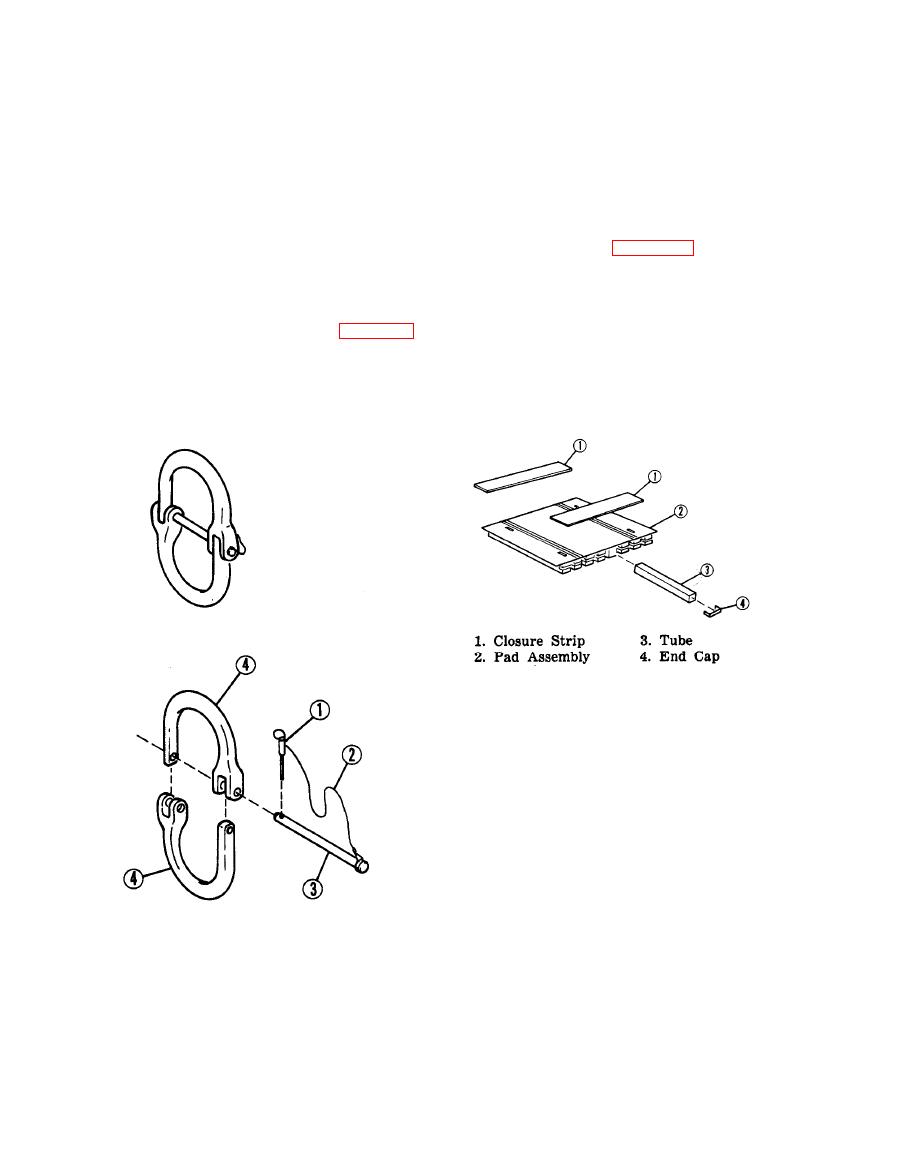
f. Load Spreader Assembly. D i s -
wear in excess of 0.02 inches shall be cause for
assemble as shown in figure 2-8 if required.
replacement. Assembly is the opposite of that
Inspect the fabric cover assembly and closure
stated for disassembly. Replace cotter pin with a
strips for tears. Check the tube assemblies for
new pin.
binding or deformation by touch. Check the bond
e. Coupling Link Assembly. Use dis-
betveen the velcro tape and cover assembly and
assembly procedures illustrated in figure 2-7.
the pad assembly. Re-bond as required. Repair
Depress the quick disconnect pin lock detent and
tears in the cover assembly by bonding on a patch
remove pin from the clevis pin. Remove clevis pin
using adhesive Liquid FED-MM-A-139. If there
and separate fitting links. Check quick disconnect
is evidence of tube deformation cut the closure
pin for freedom of operation and for alignment.
strip, remove tube and replace with a new unit.
Bond on a new closure strip.
Inspect the clevis pin for wear and cracks if the
P/N 1670EG035A1.
g. Pendant Assembly. Suspend pendant
assembly from nylon ring and allow to dry
thoroughly. Remove grit from webbing by shak-
ing and brushing. Do not use pressurized air as
this will force particles into webbing. Inspect
sling. leg and ring assembly for indications of
abrasion. If abrasion is apparent on any of the
load carrying components, they must be replaced.
h. Pendant Assembly UH-1 Type. S a m e
as above.
i. Pendant Adapter. Suspend pendant
3. Clevis Pin
L Pin
adapter, allow to dry, inspect for indication of
4. Fitting Links
2. Wire
abrasion, replace as required.
j. Positioning Strap Arrangement. Inspect
the assemblies of the arrangement for evidence of
P/N 1670EG079-1.
