TM 55-2840-241-23
Change 19 3-11
3-15. Preparing Fuel Pump and Filter Assembly for
Storage and Shipment.
NOTE
The procedure for removing the fuel pump
and filter assembly from the metal shipping
and storage container is prescribed in para-
graph 3-13.
Prepare the fuel pump and filter assembly for storage,
shipment, and installation in a metal shipping and stor-
age container, MS63052-1, as follows:
a.
Clean the exterior of the fuel pump with a clean
cloth dampened with solvent (item 3, table 2-2). Air dry
or wipe with a clean lint-free cloth . Blow out all crevices
with dry, filtered, low-pressure compressed air.
b.
Pump lubricating oil (item 37, table 2-2) into fuel
inlet port until fuel-free oil flows from the outlet port. Drain
excess oil from the fuel pump.
NOTE
If the engine fuel system was preserved in
accordance with paragraph 3-10, subpara-
graph b above may be omitted.
c.
Install shipping plugs in all ports to prevent entry
of foreign material.
d.
Coat external bare metal surfaces including the
splines with corrosion preventive compound (item 12,
table 2-2).
e.
Attach a tag to the fuel pump stating: FUEL
PUMP PRESERVED WITH LUBRICATING OIL,
MIL-L-6081, GRADE 1010.
f.
Attach a properly filled out DD Form 1577-2 (Un-
serviceable-Repairable tag). Refer to paragraph 3-9 for
additional information concerning tags.
g.
Prepare DA Form 2410 (Component Removal
and Repair/Overhaul Record) according to DA PAM
738-751 and place in a greaseproof envelope (Refer to
paragraph 3-9).
h.
Wrap the fuel pump with barrier material (item 4,
table 2-2) to prevent contact with the cushioning materi-
al and to prevent the loss of the corrosion preventive
compound. Secure barrier material with pressure-sensi-
tive tape (item 5, table 2-2) .
i.
Prepare the container for use as follows:
(1)
Loosen nut (7, figure 3-4) and remove the
ring (6), cover (9), gasket (10), and top cushion (1) from
body (4).
(2)
Check gasket (10) for damage or deteriora-
tion and replace if necessary.
(3)
Check the container for cleanliness and gen-
eral condition.
j.
Install the fuel pump in the container as follows:
(1)
Install the fuel pump upright in the container.
Ensure that it is properly seated in the bottom cushion (2,
figure 3-4).
(2)
Install top cushion (1) in the container. En-
sure that it is properly seated over the pump.
(3)
Plate two bags of dehydrating agent (item
11, table 2-2) in the voids on each side of top cushion (1)
one bag per side.
(4)
Place the fuel pump assembly records in one
of the voids at the side of the top and bottom cushions.
Tape the three-spot humidity indicator card (3) on the
side of the top cushion.
(5)
Place gasket (10) on cover (9). Install the
cover on body 14) and secure with ring (6).
(6)
Slowly tighten nut (7) while tapping on the
locking ring until 65-75 in. lb torque is obtained. Secure
the nut with wire seal (8).
k.
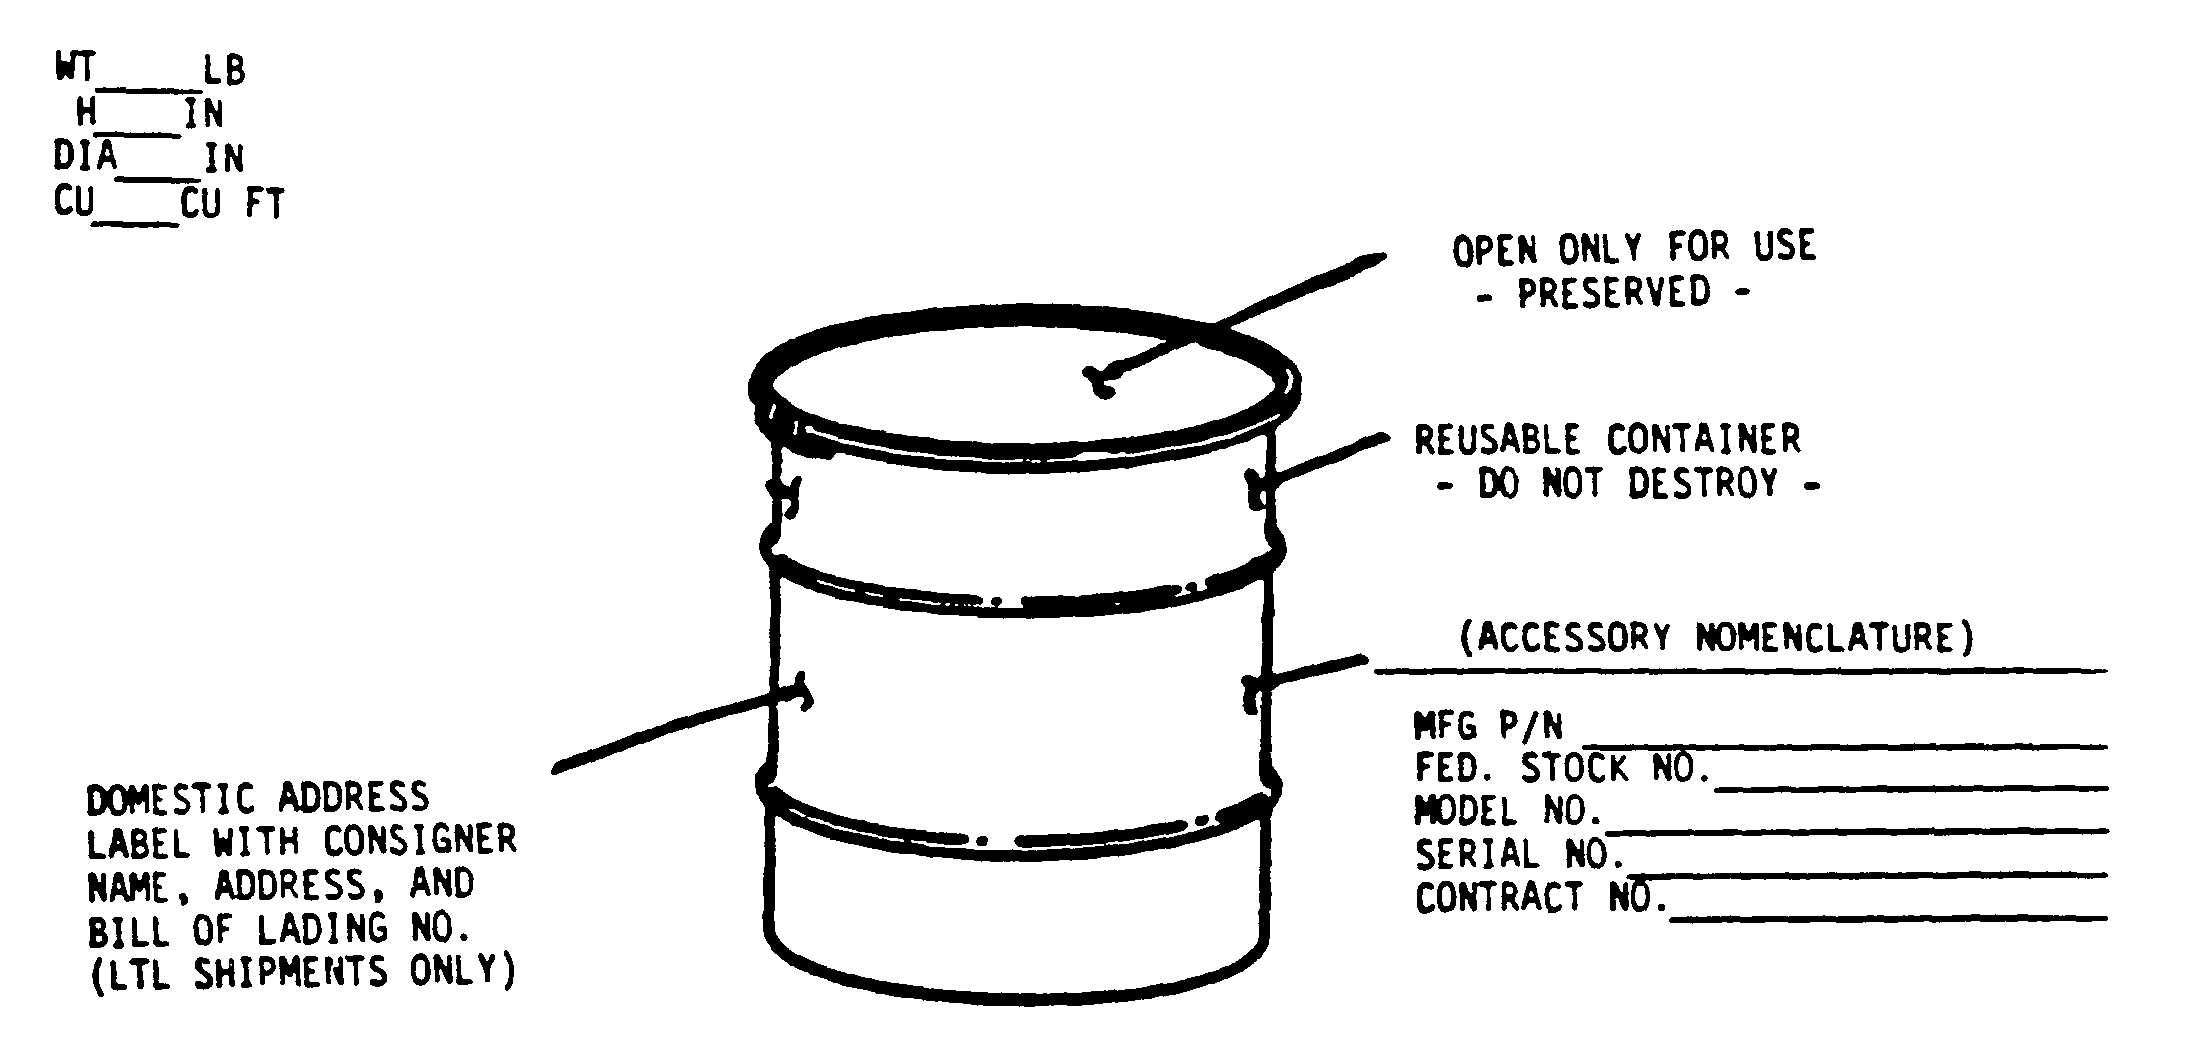
Stencil the container in accordance with para-
graph 3-9 and figure 3-5.
Figure 3-5. Accessories Shipping Container Stenciling


