TM 1-1500-204-23-3
CAUTION
Keep
lid
on
can
of
barrier
adhesive when not in use to
prevent
evaporation
and
thickening.
(j) Carefully apply a uniform coat of
barrier adhesive in one direction (1, figure 2-32) over
previous coat of repair adhesive mixture (2). Use a
brush (4). Remove any excess adhesive from unbuffed
area. Use a dean cloth (item 16, table 2-11) and
acetone (item 3, table 2-11). Wear gloves (item 4, table
2-11 ). Allow barrier to dry to touch.
(k) Apply a second coat of barrier
adhesive (3) over first coat at 90 °
to the application of
the first coat. Use a brush. Allow second coat to air dry
for 30 minutes.
(I) Prepare repair adhesive. (See
steps (f) and (g)).
CAUTION
When
smoothing
adhesive
surface with gloved fingers wet
with acetone, lightly touch only
the
surface
of
the
adhesive.
Insure acetone does not contact
barrier cement previously applied,
as the barrier cement is soluble in
acetone. Damage to the barrier
cement can result in the barrier
being damaged.
(m) Prepare a new batch of adhesive
(item 1, table 2-11) and carefully apply a uniform
(liberal/heavy) coat of repair adhesive (1, figure 2-34)
over previous coats of barrier adhesive. Smooth
surface with gloved fingers wet with acetone (item 3,
table 2-11) and remove any excess adhesive from
unbuffed area with a dean cloth (item 16, table 2-11)
and acetone (item 3, table 2-11). Wear gloves (item 4,
table 2-11).
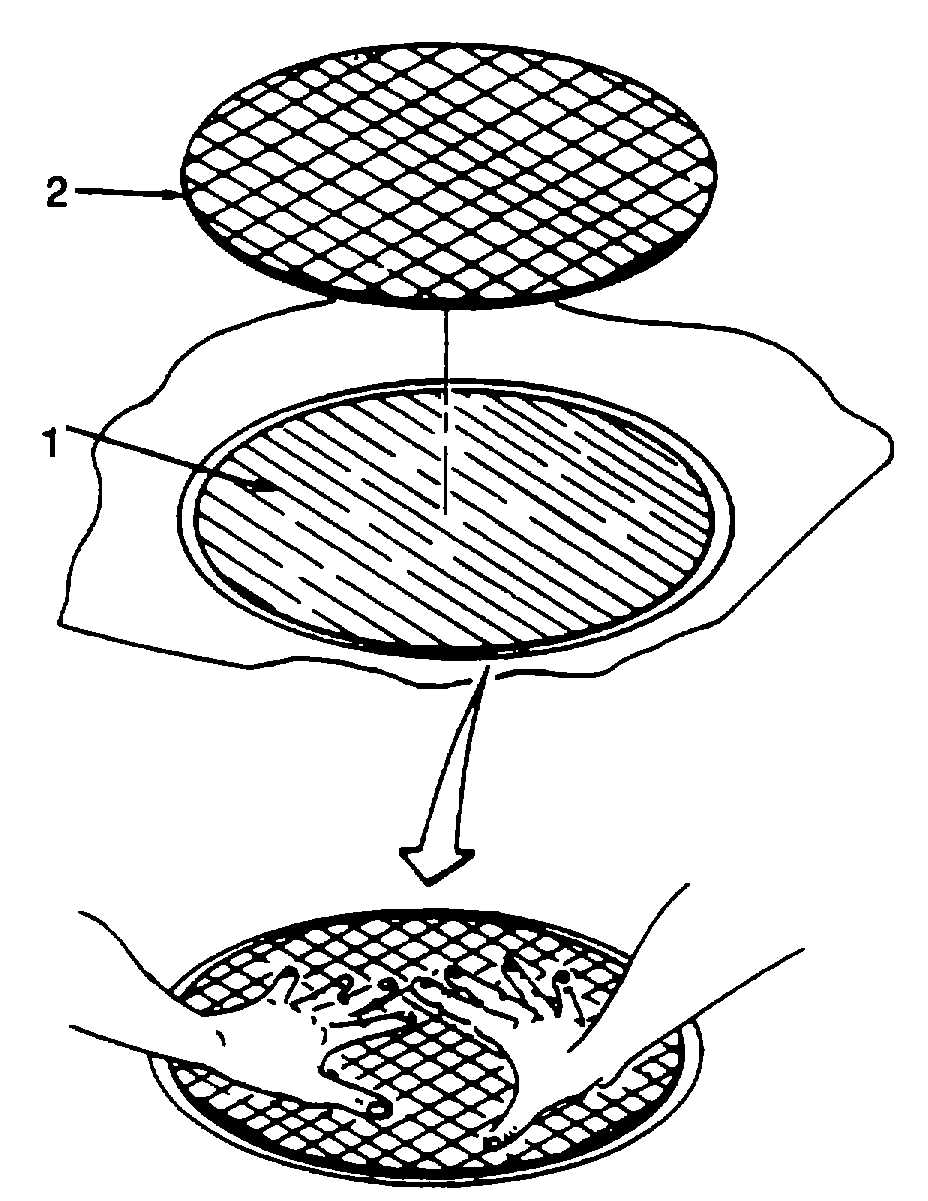
(n) Wet fabric reinforcement patch (2)
with acetone (item 3, table 2-11). Shake out excess
acetone.
(o) Center wet patch over defect area
and press into wet adhesive (1) with fingers to make
certain patch is free of air bubbles and loose edges.
Figure 2-34. Centering Wet Patch
(p) Allow cement and fabric patch to air
cure approximately 30 minutes.
CAUTION
When
smoothing
adhesive
surface with gloved fingers wet
with acetone, lightly touch only
the
surface
of
the
adhesive.
Insure acetone does not contact
barrier cement previously applied,
as the barrier cement is soluble in
acetone. Damage to the barrier
cement can result in the barrier
being damaged.
(q) Prepare a new batch of adhesive
(item 1, table 2-11 ) and carefully apply a uniform coat
of repair adhesive (1, figure 2-30) over patched area to
within no more than 1/8 inch of O.D. of buffed edge.
Smooth surface with gloved fingers wet with acetone
(item 3, table 2-11). Use a brush (item 6, table 2-11).
Remove any excess adhesive with cloths dampened
with acetone (item 3, table 2-11). Wear gloves (item 4,
table 2-11).
CAUTION
Do not flex cell in repair area.
(r) Allow finished repair to set for 1
hour before moving fuel cell.
Change 2 2-52


