
NAVAIR 01-1A-505-2
011 02
TO 00-25-255-1
Page 14
TM 1-1500-323-24-2
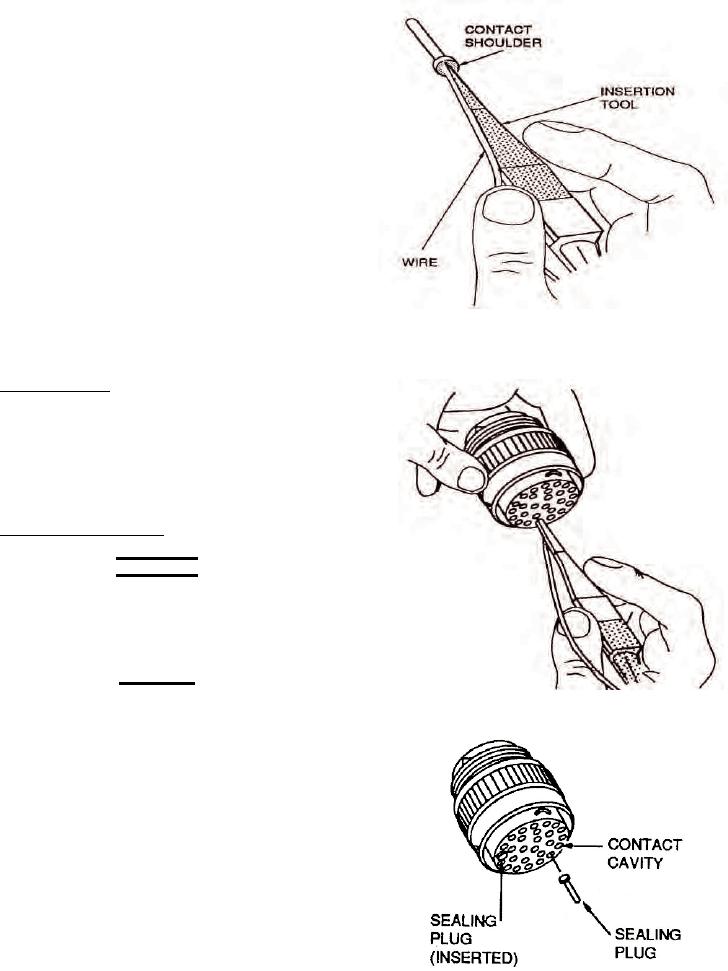
h. Pull tool straight out of contact cavity. Remove
tool from wire. Pull back lightly on wire to ensure
contact is property seated.
i.
Seal connector as required (Paragraph 90) and
install backshell.
90. CONNECTOR SEALING.
91. Sealing Plugs. Seal connector in accordance with
following procedure:
a. Fill all unused cavities with un-crimped
contacts (Paragraph 89).
b. Insert sealing plug, large diameter first, until
bottomed in contact cavity (Figure 12). Fill all cavities
Figure 10. Inserting Contact Into Insertion Tool
that have un-crimped contacts. Preserve connector in
accordance with NAVAIR 01-1A-505-1, WP 026 00.
92. Moisture Barrier. For connector sealing procedures,
including application of sealant to grommet sealed
connectors, refer to NAVAIR 01-1A-505-1, WP 025 00.
93. CONTACT REMOVAL. Remove wired, unwired,
and broken wire contacts in accordance with following
paragraphs.
94. Wired Contact Removal.
WARNING
Metal tool tips are sharp and can cause injury
to personnel and/or damage to connectors.
Exercise caution when using this tooling.
CAUTION
Figure 11. Contact Insertion
Metal tooling may damage the wire sealing
grommet at the end of the connectors. Use of
plastic tools is preferred.
a.
Select removal tool (Table 4).
b. Inspect tips of metal tools for nicks, burrs, and
distortion of probe before use as connector damage can
occur.
c.
Place wire of contact to be removed into
removal tool, with white tip facing connector insert
(Figure 13).
Figure 12. Inserting Sealing Plug into Contact Cavity