
TM 10-4930-351-14
0109 00
NOTE
Two of the socket head cap screws are slightly shorter than the other eight. They are to
be inserted at the 11 and 12 o'clock screw holes.
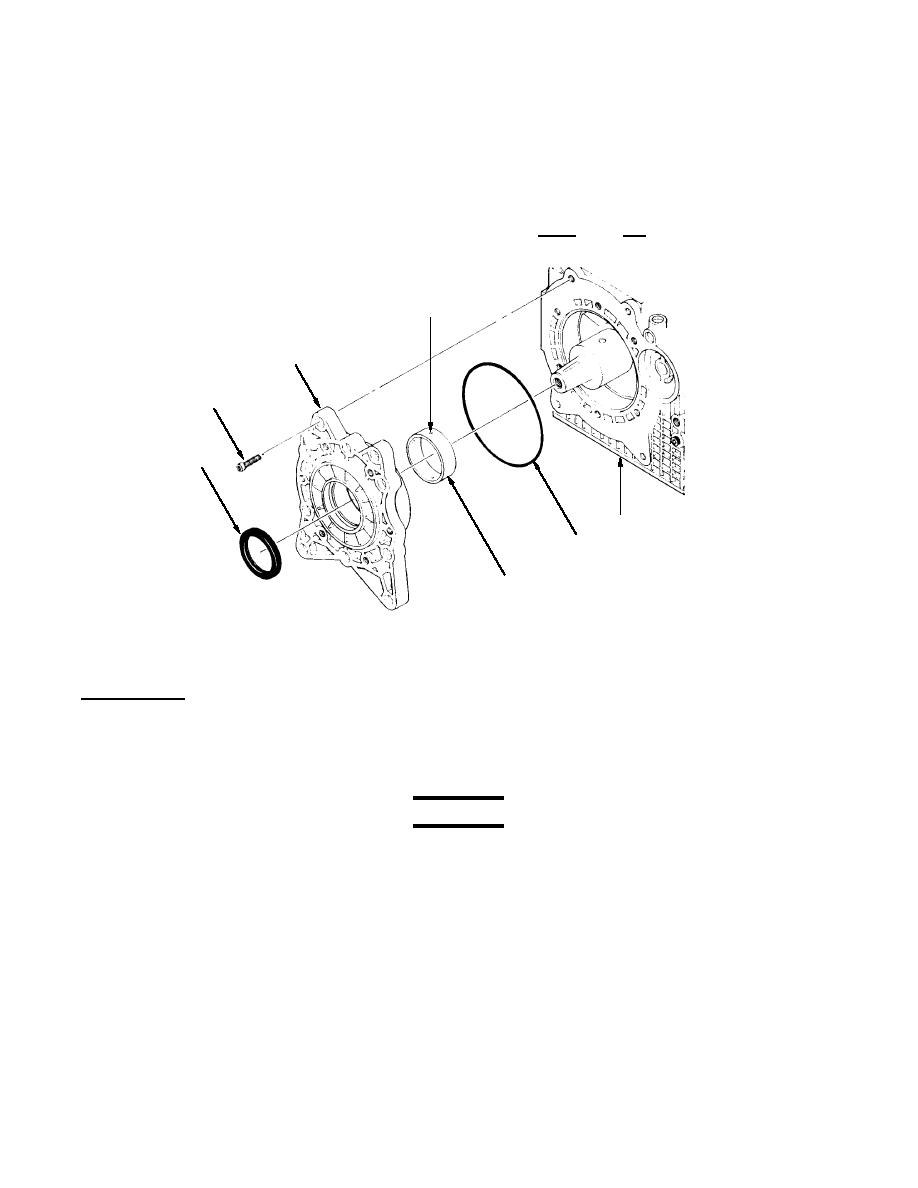
13. Position rear crankshaft support (3) and install ten socket head cap screws (6) attaching engine rear crankshaft support to
crankcase (7).
14. Using a crossing pattern, torque socket head cap screws (6) to 190-195 in. lbs (21-23 Nm).
2
3
6
4
7
5
1
Figure 3. Rear Crankshaft Support Installation
Refer to Figure 1.
15. Insert a 0.006 in. (0.15 mm) thickness gauge between crankshaft (3) and crankcase (figure 2, 2). Place a screwdriver
between the crankcase center bearing support web and crankshaft throw to force crankshaft toward front (flywheel end)
of crankcase (figure 2, 2).
WARNING
Hot metal can burn and cause severe personal injury. Wear protective gloves as needed.
16. Using a warming oven, heat crankshaft gear (7) to 356 F - 392 F (180 C - 200 C) for 20 to 30 minutes.
17. Install key (8) on flywheel end of crankshaft (3).
18. With crankshaft gear (7) timing mark facing flywheel end, install hot crankshaft gear over key (8) on crankshaft (3).
Allow crankshaft gear (7) to cool down. Remove screwdriver and thickness gage from crankcase.
19. Check crankshaft end float clearance between crankcase and crankshaft gear (7). Clearance should be 0.004-0.008 in.
(0.10-0.20 mm). Crankshaft (3) should turn freely.
0109 00-4
