TM 55-2840-241-23
7-18 Change 19
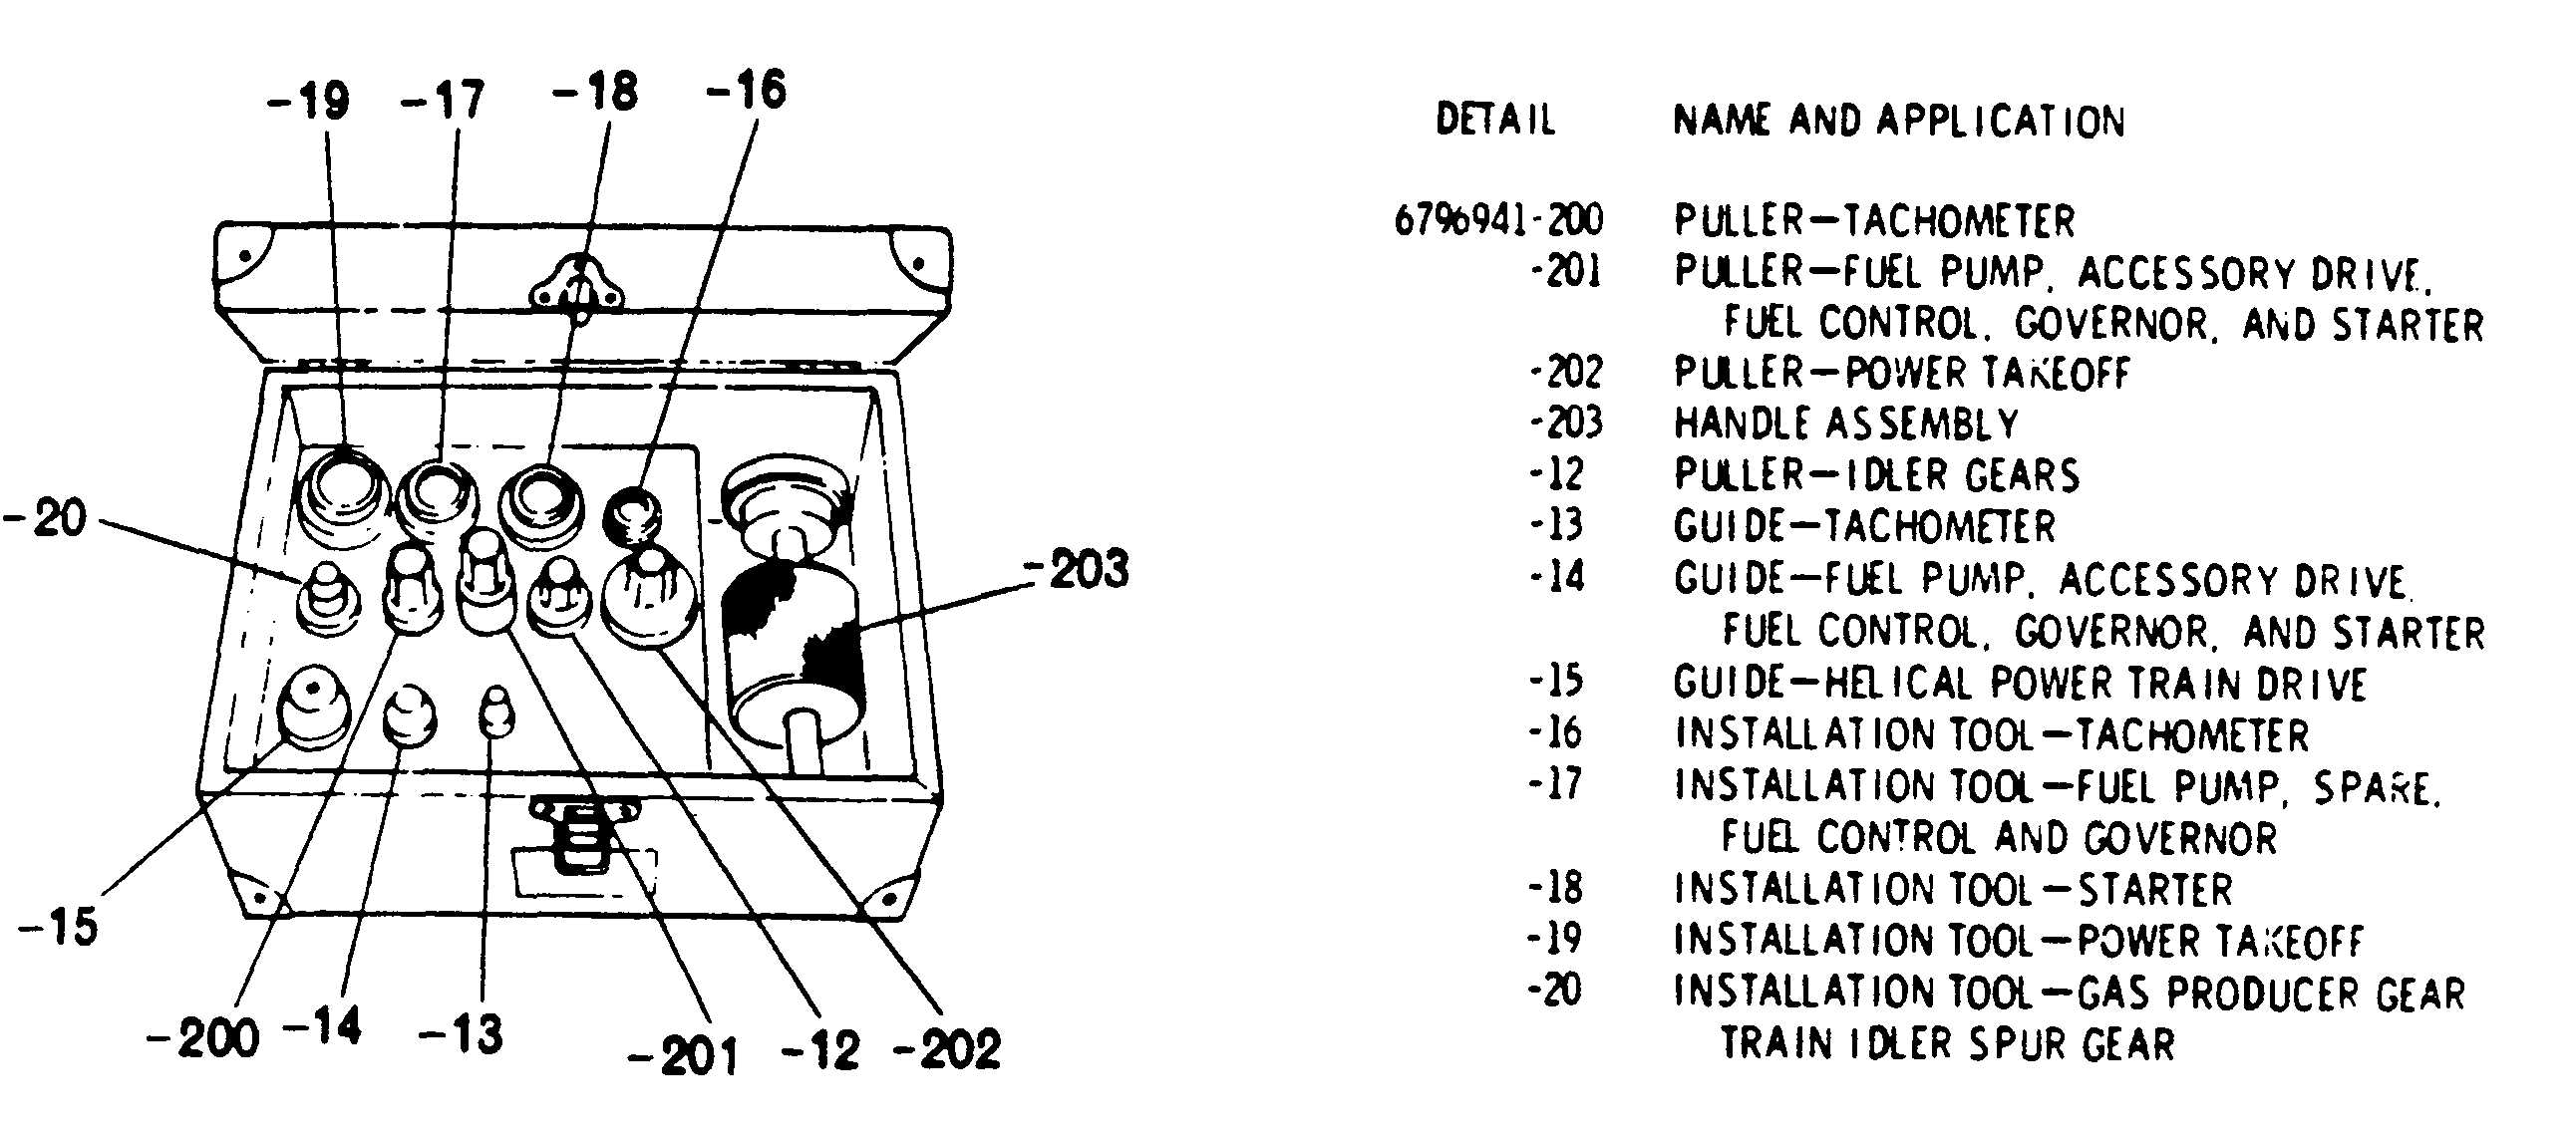
Figure 7-14. Seal Puller Kit
7-26. Diffuser Scroll.
WARNING deleted.
Air Tube Insert Blend Repair. Using abrasive paper
(item 30, table 2-2) blend and polish wear in the ID of the
air tube inserts which does not exceed 0.010 in. depth.
Blend and polish wear step as necessary to ensure free-
dom of movement of the air tube seals and to ensure that
the sealing properties will not be impaired.
7-27. Gearbox External Seals Replacement.
CAUTION
To prevent damage to the gearbox hous-
ing, do not pry between the seal cavity in
the gearbox housing and the seal. Be care-
ful not to contaminate the shaft bearing or
damage the gearshaft.
a.
Remove the accessory or drive from the gearbox
pad.
b.
Remove defective seals using seal puller kit, tool
No. 6796941 as follows: (See figure 7-14.)
(1)
Use-201 detail to remove seals (1, figure
7-15).
(2)
Use-202 detail to remove seals (2).
(3)
Use-200 detail to remove seals (3).
c.
Discard removed seals.
d.
Apply grease (item 14, table 2-2) to the seal lip
to aid installation. Carefully drive the new seal into place
using seal kit, tool No. 6796941 as follows: (See figure
7-14.)
(1)
Use-17 detail to install seals (1, figure 7-15)
at the fuel pump, spare accessory, fuel control, and gov-
ernor pads.
(2)
Use-18 detail to install seal (1) at the starter-
generator pad.
(3)
Use-19 detail to install seals (2) at the power
takeoff pads.
(4)
Use-16 detail to install seals (3) at the
tachometer pads.
e.
Reinstall the accessory or drive on the gearbox
pad.
7-28. Gearbox External Stud Replacement.
a.
Remove and discard damaged stud.
b.
Clean and retap stud hole threads only when con-
dition of hole threads restrains stud installation. Use the
same size tap. (See figure 7-16.)
CAUTION
Keep the amount of compound used in a
blind hole to a minimum to eliminate the
possibility of cracking the casting.
c.
Apply antiseize compound (item 27, table 2-2) to
the stud threads and to the stud hole threads.
d.
Install the stud and tighten to obtain the torque
and setting height specified on figure 7-16. Oversize re-
placement studs may be used when necessary.


