TM 1-1500-204-23-9
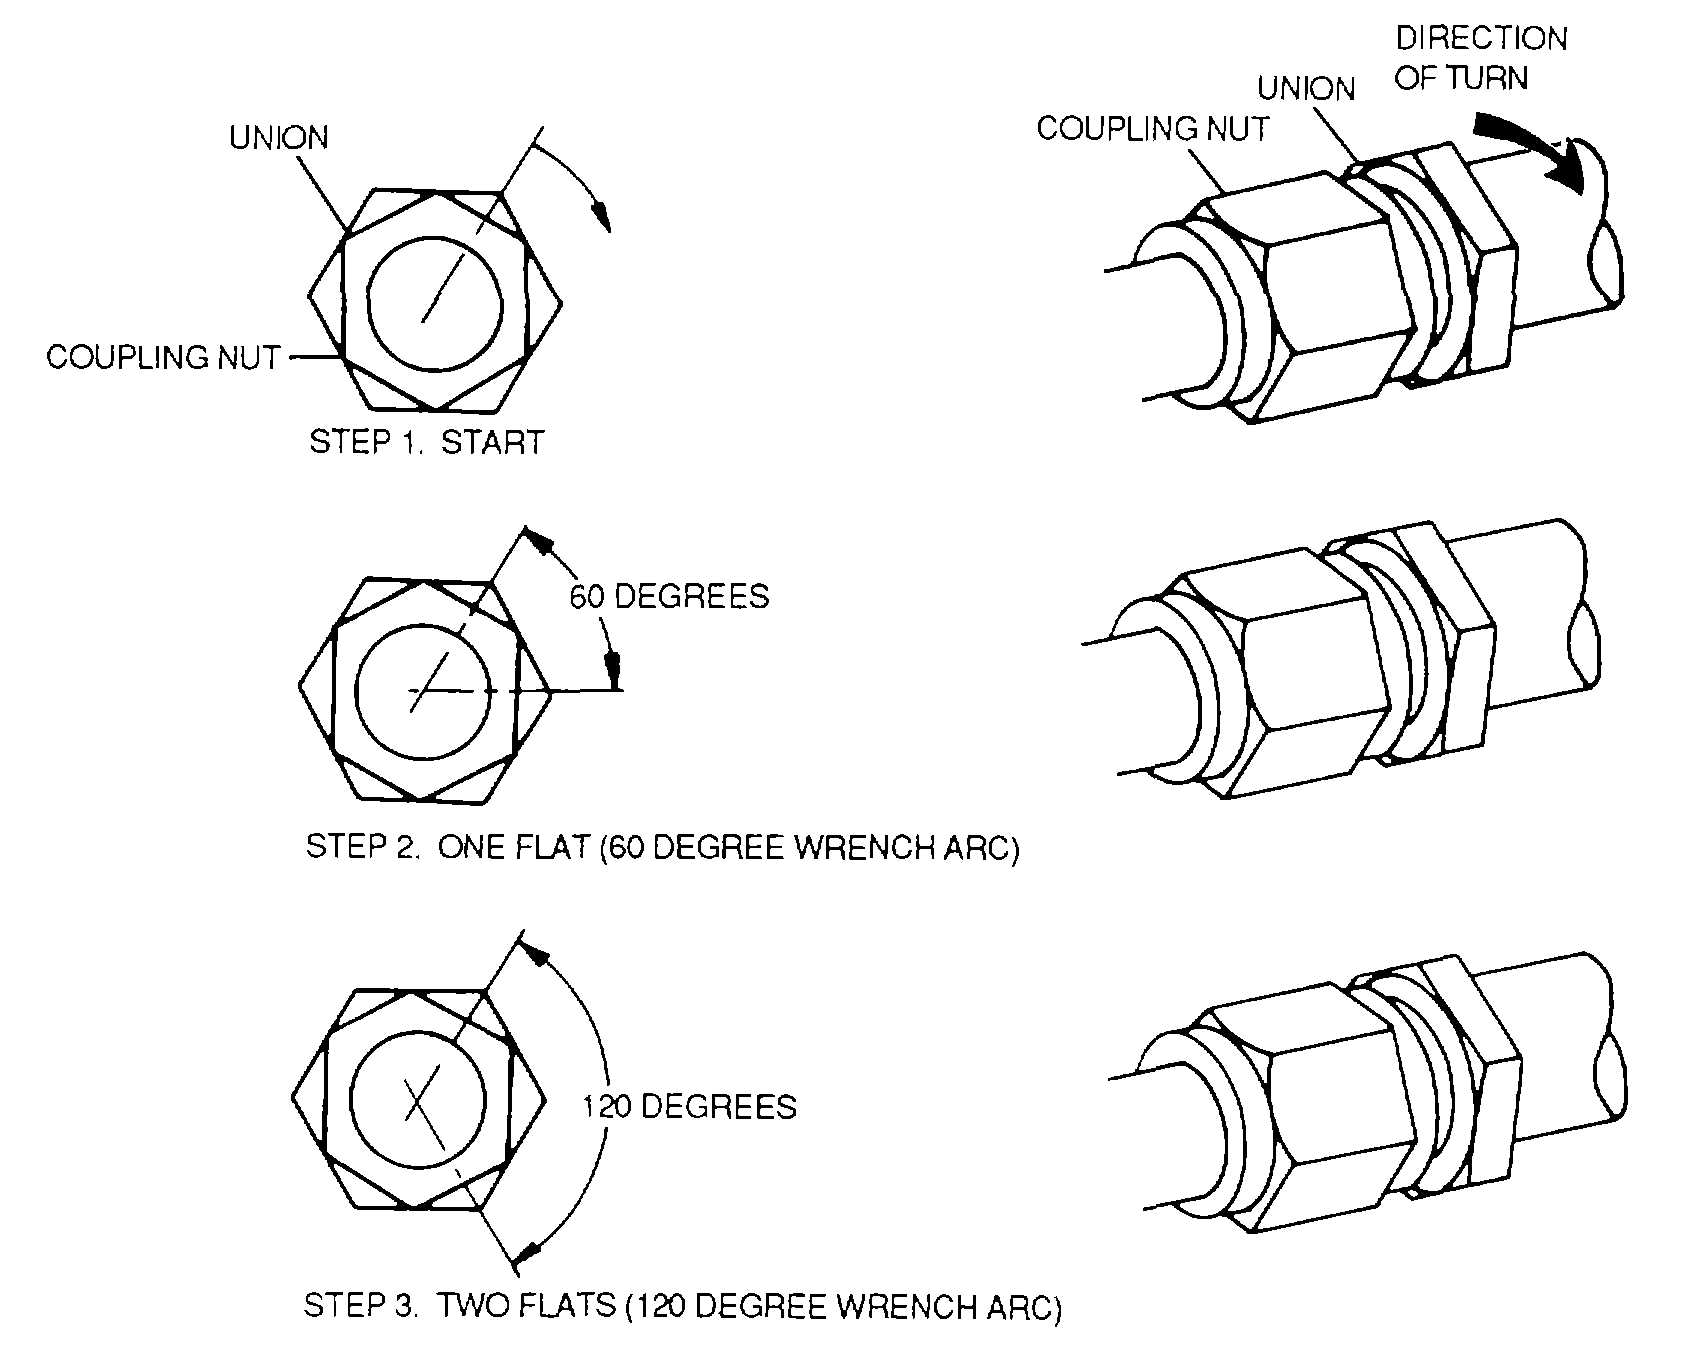
Figure 8-26. Tightening to 60- or 120-Degree Wrench Arc
(c) For 180 degree arc, turn wrench until handle
points in opposite direction.
b. Preload indicating Washers. The preload
indicating washer, shown in figure 8-29, consists of two
plain washers, one inner preload washer, and one outer
preload washer. The plain washers mash the inner
preload ring into the outer preload ring. When this has
occurred, the nut or bolt is properly tightened (see figure
8-30).
(1) Installation of preload washer on stud. To install
preload washers on a stud, see figure 8-31 and proceed
as follows:
(a) Install plain washer.
(b) Install inner preload washer.
(c) Install outer preload washer.
(d) Install plain washer.
(2) Installation of preload washer on a bolt. To
install preload washers on a bolt, see figure 8-32.
(3) Tightening. To tighten preload washers on a
stud or a bolt, see figure 8-33 and proceed as follows:
NOTE
An aircraft inspector or supervisor may be
required to be present during tightening of
the preload indicating washers to verify
that the preload washer has been properly
tightened.
(a) Place a ratchet handle wrench with socket on
the nut.
(b) Place a scribe in one of the preload indicating
outer ring holes.
(c) Move the preload ring with the scribe and
tighten the nut. As soon as the preload washer can no
8-14