TM 1-1500-204-23-6
NOTE
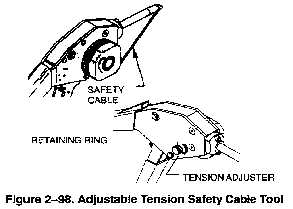
When using a hand tool, the tool handle
is to remain fully open during the cable
entry process (in both tool models). The
handle is to be actuated in the pre-set
tension model after the tension pawl is
engaged with the cable, and in the
adjustable tension model only after the
desired tension is achieved.
Figure 2-98. Adjustable Tension Safety cable Tool
c.
The Pneumatic Safety Cable Application
Tool. (See figure 2-99). Connect the pneumatic safety
cable tool to a clean, dry air supply of 80 to 100 psi.
(1)
Install the safety cable through the
fasteners which are to be secured.
(2)
The nose can be indexed to four
positions in 900 increments. To select the position,
push the nose in towards the tool and rotate to the
desired position. Release the nose. If the nose does
not lock into the indexed position, turn it slightly until it
snaps into position and locks.
CAUTION
Do not actuate the tool unless the
nose
is
locked
into
position.
Actuation of the tool without the
nose being locked will severely
damage the nose or other tool
components.
(3)
Insert the free end of the cable through
the ferrule in the cartridge and remove the ferrule by
pulling the cable away from the end of the cartridge.
Insert the free end of the cable through the nose of the
tool and slide the tool along the cable to the desired
position.
(4)
Rotate the cable tensioning wheel
clockwise if necessary to move the cable entry slot to an
accessible position. Align the nose such that the ferrule
is pressed squarely against the fastener. Make certain
that the ferrule is fully seated into the nose. Insert the
free end of the cable into the cable entry slot of the
cable tensioning wheel. When the end of the cable exits
the wheel, grip the cable and pull the slack from the
cable. Do not leave more than 1 1/2" of total slack in
the cable.
(5)
Press the trigger and hold. The tool
will apply tension to the cable, crimp and cut. When the
trigger is released, the crimp mechanism will retract
(after the cycle is complete), and the tool nose can be
moved from the ferrule. The excess cable shall be
discarded.
(6)
The tension is adjustable by inserting
the manufacturer supplied adjustment key into the
adjustment port located on the tool handle. Clockwise
rotation increases tension, and counter clockwise
rotation decreases tension.
Figure 2-99. Pneumatic Safety Cable Application
Tool
2-22. Safety Cable Application Tool Maintenance
and Calibration. The safety cable tools should be
stored in a clean, dry place when not in use. Clean any
debris (especially in the crimp cavity in the tool nose)
from the tool with a small brush and solvent if
necessary. Lubricate the tool nose (into the crimp
cavity) with a drop of oil on a regular basis.
Change 2 2-90