TM 1-1500-204-23-1
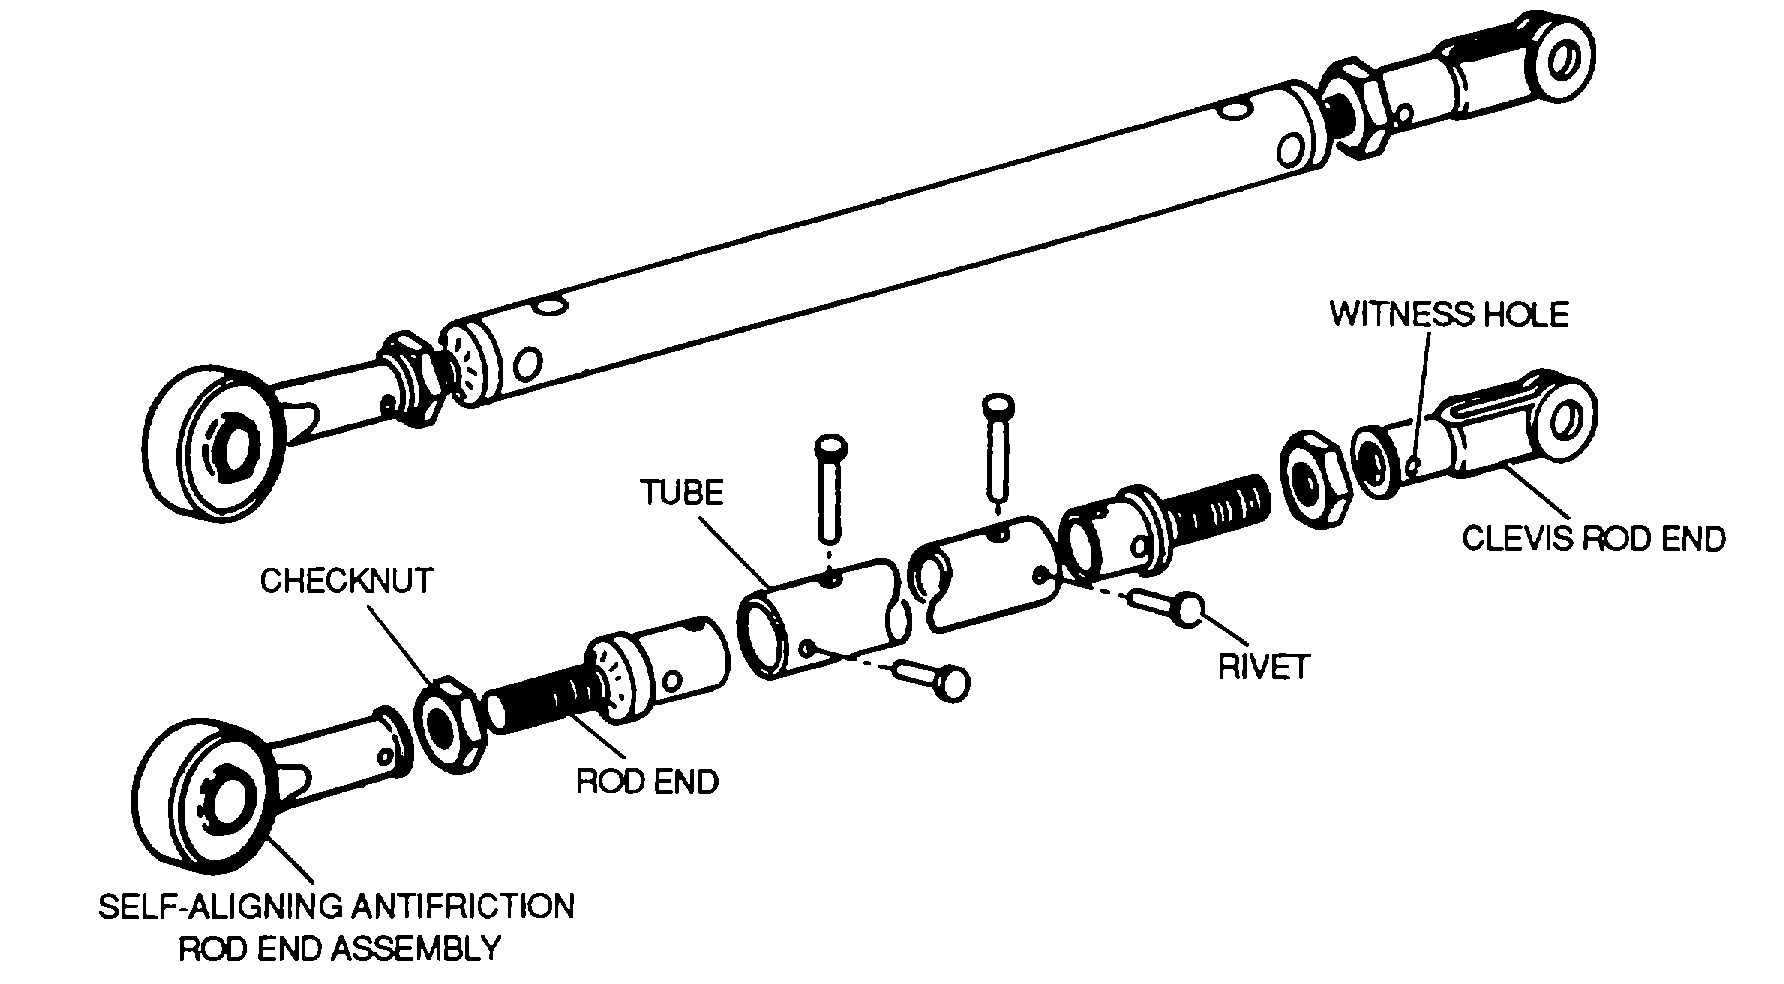
Figure 9-29. Control Tube Assembly
NOTE
If in doubt as to presence of cracks
in tube, strip the paint and make a
magnetic-particle
or
fluorescent-
penetrant inspection.
3 Check rod ends for security
(loose rivets), cracks or breaks, and damaged threaded
portions.
(b)
Repair of control tubes. Control
tubes can be repaired by methods similar to those used
on structural members. When repairing a control tube,
a perfect straightness must be obtained to preserve the
full strength of the tube. Sleeve reinforcements may be
added to steel tubes with a scarfed or fishmouth cut and
then welded in place. Aluminum alloy tubes can be
repaired in the same manner, using rivets for
attachment. If possible, the tube should be replaced
and the terminals salvaged. AN490 threaded rod ends
should be replaced because of difficulty in picking up
the original rivet holes.
NOTE
Do not attempt tube repair if center
one-third of assembly is damaged.
When replacing rod ends that are
riveted to control tube, rotate tube 90
degrees and redrill prior to riveting in
emergency,
repair
tubular
type
control rod by inserting a scarfed or
fishmouth sleeve reinforcement.
(c)
Installation of control tubes.
Install control tube assembly and rod ends as a unit, and
make adjustments at time of installation. Consult
applicable aircraft manual for proper dimensions and
settings. The following are general procedures:
1
Install
checknut
on
tube
assembly or threaded end of rod, and attach rod end to
assembly.
2 Adjust rod end to obtain
correct length of tube assembly Tighten checknut
against rod end to prevent its coming loose.
9-27


