NAVAIR 01-1A-505-3
TO 1-1A-14-3
TM 1-1500-323-24-3
010 02
1 September 2011
Page 15
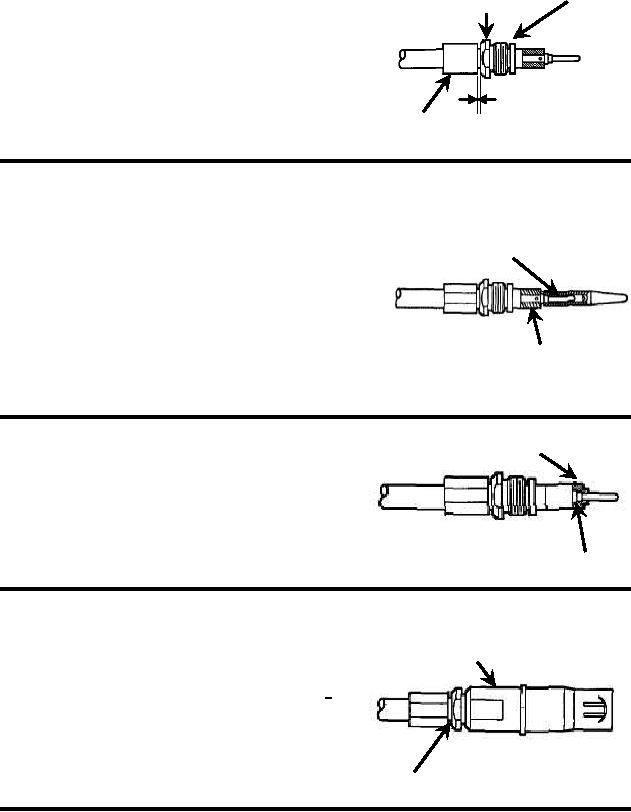
F. Slide Retainer Assembly Over Center
Retainer
Nut
Contact and under Shield. Retainer Must Seat Against
Shield.
G. Arrange Shield As Close To Original Lay As
Possible. Slide Crimp Sleeve over Shield and Retainer
1/64 To 3/64 Inch
until Gap of 0.010 to 0.050 Inch Exits between Nut and
Crimp Sleeve.
Crimp Sleeve
H. Using M22520/01 Crimp Tool Frame and
M22520/5-08 Die Set, Or M22520/10-01 Crimp Tool
Frame and M22520/10-05 Die Set, Secure Crimp
Expander Tool
Sleeve By Crimping In Die Closure B (Table 6). Nut
Must Rotate Freely After Crimping.
I. Install Expander Tool From Expander Tool Kit over
Center Contact. Slide Rear Insulator over Expander
Tool Until Seated Behind Contact Shoulder.
Rear Insulator
Front Insulator
J. Slide Front Insulator, Large Diameter First, Over
Center Contact Until Seated Against Contact Shoulder.
Contact Shoulder
K. Slide Contact Body Over Center Contact Assembly.
Thread Nut Into Contact Body Until Retainer Is Seated
In Contact Body.
Contact Body
L. Using Wrench, Hold Outer Contact Body. Using
Inch-Ounces.
Nut
Figure 8. MIL-DTL-26518 Size 8 Shielded Contact Assembly (Sheet 2)

