TM 1-1500-204-23-9
(a)
Adjust the grinding wheel rest to a
convenient height for resting the back of the hand while
grinding.
(b)
Hold the drill between the thumb and the
index finger and grasp the body of the drill near the
shank with the other hand.
WARNING
Eye protection will be worn when
grinding drills. Failure to comply may
result in serious injury to personnel.
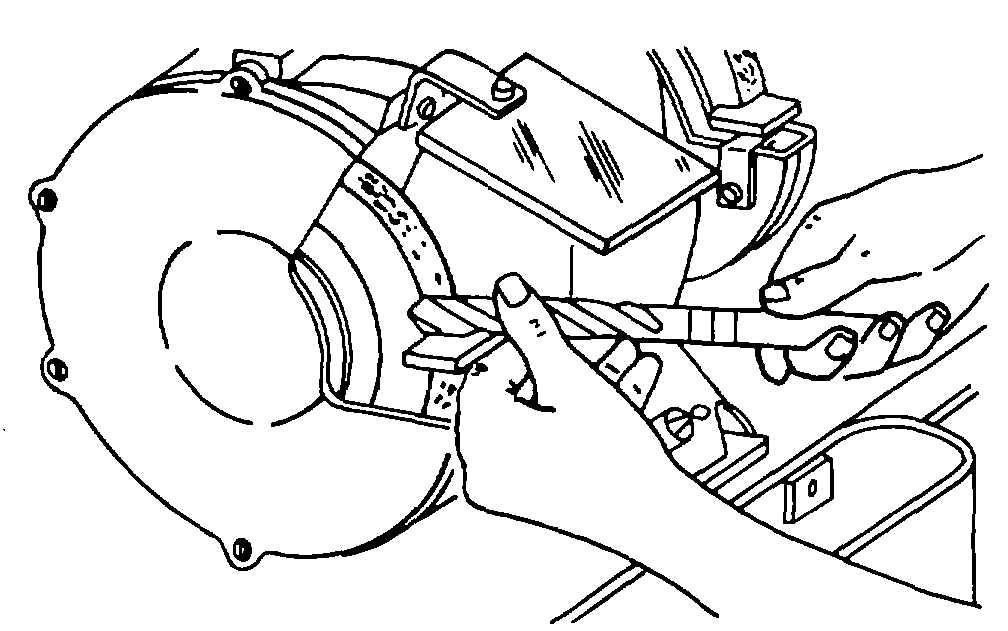
(c)
As shown in figure 4-87, place hand on
the wheel rest with the centerline of the drill forming the
desired angle with the cutting face of the wheel. Slightly
lower the shank end of the drill.
Figure 4-87. Hand Grinding of Cutting Edge
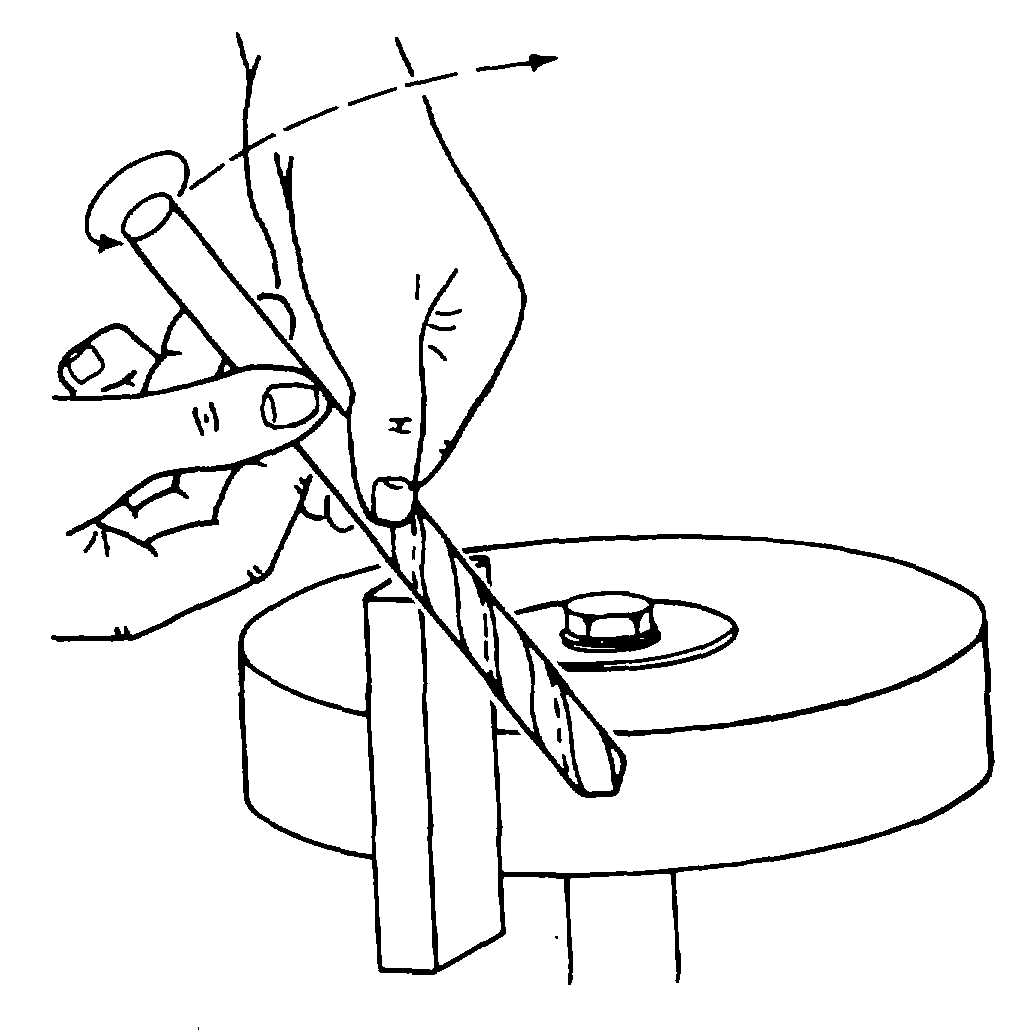
(d)
Slowly place the heel of the drill against
the grinding wheel, as shown in figure 4-88. Gradually
raise the shank end of the drill and rotate it in a
counterclockwise direction while the grinding wheel
approaches the cutting edge.
(e)
Cool the drill in water frequently while
grinding to preserve the temper.
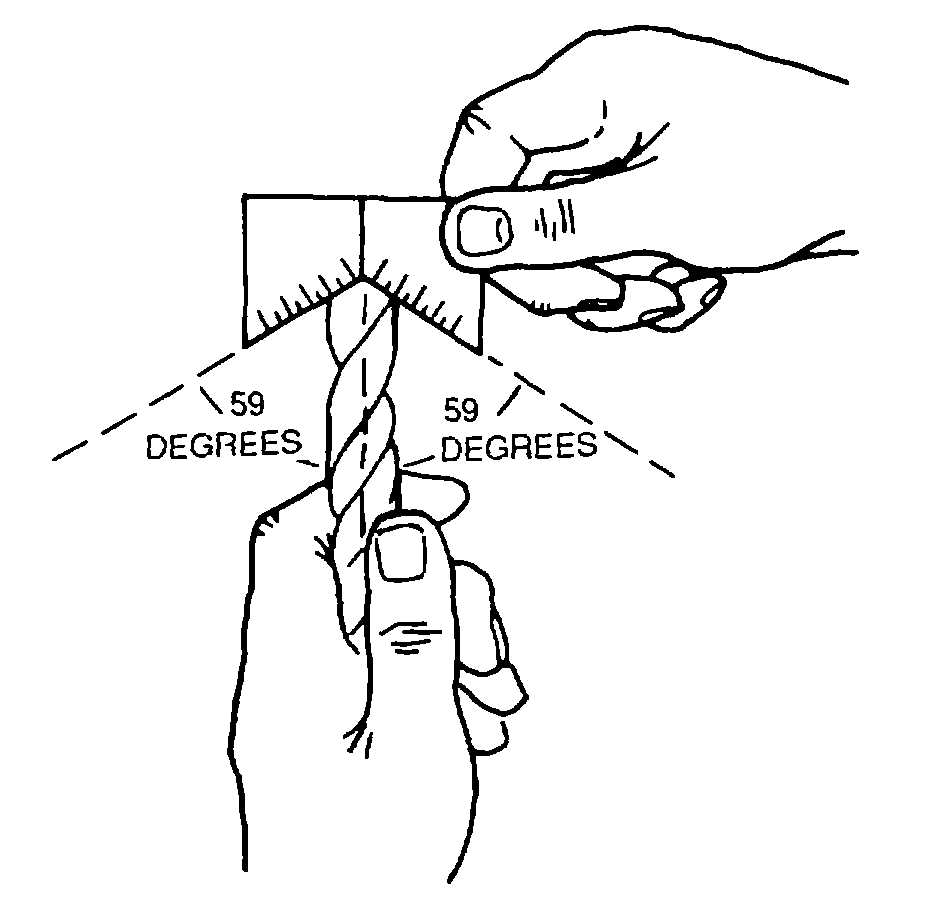
(3)
Testing angles. Test the results of
grinding with a drill grinding gauge to determine that the
cutting edges are the same length and the angles are
correct. This is shown in figure 4-89. To determine heel
angle, proceed as follows:
(a)
Cut a piece of paper 8-1/2 inches long
and 2 inches wide.
Figure 4-88. Hand Grinding of Heel to
Cutting Edge
Figure 4-89. Using Drill Grinding Gauge
(b)
Place a mark 1-1/4 inches from the top
and wrap the paper around the drill.
(c)
As shown in figure 4-90, the edge of the
paper should coincide with the mark on the paper if the
heel angle is correct.
4-33